Sewing dolls in such an unusual style as a tilda doll was invented by a woman from Norway, Tony Finger, about 20 years ago.
She opened a doll tailoring studio and published several books. Tony instantly became popular in Europe.
To date, the author has published 5 books with ideas and tips for making tilda toys. Toys have unique style features: elongated body parts (face, arms, legs, paws, ears), small bead eyes and textile material used. No plastic.
Tildes can be like humans, animals, fairytale characters, or fictional creatures.
Tony herself does not associate tilds only with children's toys, but rather recommends decorating them with home decor more often.

To make a today's tilda-style doll, you will need the following materials: a piece of flesh-colored cotton fabric, fabric for sewing doll dresses and panties, synthetic filler, felting wool, cotton lace, ribbons, buttons, flowers, waxed cord for decoration, threads in tone , transparent white monofilament, needle, scissors, dressmaker pins and needles, sushi stick, black acrylic paint, pencil, tailor's chalk, sewing machine, brush with blush, ironing and pattern.
The creative process begins
Material for the dress is selected harmoniously to the lace and body of the doll. For this master class, blue tones for dresses and accessories were selected. The body tissue is flesh-colored. In the event that there is no material of the desired shade, white cotton is able to acquire the desired shade with tea, coffee. Before tinting, it is recommended that you first test on a test piece of fabric.

The drawing from the pattern is transferred to paper or printed using a printer. If desired, the details can be increased.

Details are cut out and transferred to the fabric. You can outline the contours with a pencil or a special disappearing marker, or tailor's chalk. Allowances are necessarily made (Fig. 1).
The process of stitching parts on a sewing machine begins. Be sure to leave a place, not a stitched area for the ability to turn the fabric on the front side (Fig. 2). On the hands of the doll, a blind seam is manually applied. Notches 3 mm from the seam inside the product are made at the corners of the parts (Fig. 3). Thus, when inverting, the outlines of the thumb are obtained.
The resulting parts of the legs and handles are turned on the front side using chopsticks for sushi (Fig. 4).
All parts of the arms, legs and body are filled with synthetic filler. The product’s head is filled most densely, in order to avoid its sinking in the future back or in any direction. The face should be even (Fig. 5);
As indicated in Fig. 6, the left holes for eversion are sutured. Used monofilament. The seam is flush.

You can change the pattern a little and sew a full-fledged arm separately (up to the shoulder) (Fig. 7), or it can be done exactly as in the original figure: the arm is made from the elbow and down.
The torso below is sewn up with a secret seam. Foot holes are included. Legs are sewn into them. During sewing on the second leg, the correspondence of its length to the first leg is checked. If desired, the future tilde doll can be planted, therefore, when attaching the legs to the body, this is taken into account (Fig. 8). Handles are so far laid aside. Their time will come later.
Tailoring
Details of panties are hidden on the fabric. It is required to cut two parts (Fig. 9).
Each of them is bent in half and the inner seam is sewn on a machine (Fig. 10, 11).
On the wrong side, future pants are sutured and turned on the front side (Fig. 12).

Panties are put on a doll and sewn to the body. The fabric is necessarily bent by 0.5 cm. The seam is laid manually (Fig. 13). Used monofilament.
At the bottom of the panties are assembled in assemblies (Fig. 14).
Dress is sewn. The fabric is trapezoidal. However, you can invent your own style. According to the pattern, the holes for the handles are not needed, they are not covered (Fig. 15).
The dress is sewn from above with a hem of 1.5 cm. Lace is sewn along the lower edge (Fig. 16).
It was the turn of the sleeve (Fig. 17). An arbitrary sleeve width is taken. It lies on the wrong side, and then it turns out. Everything is like in clothes for people. Lace is sewn from the inside (Fig. 18, 19).

The resulting sleeve is strung on the arm (Fig. 20). It can be sewn.
The result should be two wonderful neat puppet sleeves (Fig. 21).
The dress. Lace is sewn on the bottom of the dress. Above a stitch of 1 cm, it is required to pass from the front with a stabilizing stitch (Fig. 22). In the figure, it is clearly visible.
Only now it is possible to combine the edges of the dress in one piece (Fig. 23).
Clothing is worn on a tilde (Fig. 24).

Hands are attached to the body (Fig. 25). To create their great mobility, button fastening is recommended.
An original star-shaped button is sewn into the neck area with waxed cord ties (Fig. 26).
Doll hair is made. In the figure, they consist of felting wool (Fig. 27). Hairstyle is formed by a comb: parting and the desired length.
Figure 28 shows that in the parting area at the back and on the crown, a monofilament stitch is manually sewn. In this way, the hair is fixed in the head. If necessary, you can sew a line around the face.
Finally, braids on the hair are braided (Fig. 29). Floral decorations are inserted into the braids.
From the existing decorations, a flower bouquet is collected for the tilde (Fig. 30). It is sewn with monofilament to the hands.
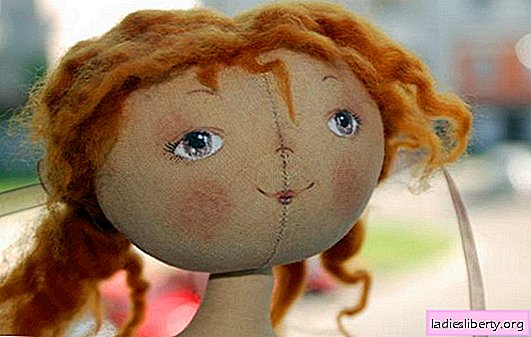
At the end of the work, eyes are drawn for the chrysalis, cheeks are blushed.